We can also customize the Quick Access area according to our preferences. There’s a lot more to learn about the File Explorer program. Here’s why we’ve created this guide that explains all the essential functions of File Explorer thoroughly. It’s a perfect guide to refer to whenever you need any kind of help with File Explorer in Windows 11.
What File Explorer Is Used for in Windows 11?
File Explorer is a built-in tool in Windows OS that lets us access documents, photos, videos, etc., stored on our PC in one place. It systematically organizes the data stored on our system into different sections to enable us to access them quickly when needed. For instance, whatever we download from the internet on our PC is directly stored in the Downloads section. In case the downloaded file is a PNG or JPG file, then it can be viewed in both Downloads and Photos sections. Hence, this makes file management much easier. The list of File Explorers functions keeps increasing as we keep using it. This was a basic overview of the File Explorer program in Windows 11.
How to Open File Explorer in Windows 11?
There are seven methods to open the File Explorer program in Windows 11. Here in this section, we’ve explained all the methods in detail.
From the Windows Taskbar
The simplest method to open File Explorer in Windows 11 is straight from the taskbar. In the taskbar, look for the File Explorer icon and double-click on it to launch it. If the icon isn’t there, right-click on the File Explorer icon on the desktop and choose the Pin to taskbar option from the contextual menu. That’s it! You can now open the File Explorer program from the taskbar.
Using Windows Search Box
Another easy way to access programs in Windows is using the Windows Search Box. You can use the Windows Search Box to open the File Explorer program anytime. Here are the steps to open the File Explorer program:
- To start, press the Windows + S shortcut to open the Windows Search Box.
- Now, type File Explorer and select it from the Best match section to launch it.
From Windows Start Menu
You can also open File Explorer from the Start Menu, which is one of the most common ways to open programs and features in Windows. Below are the steps to do the same:
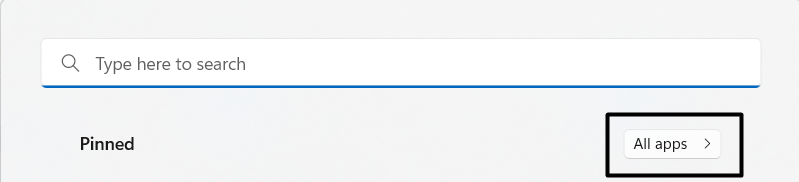
- The first step is to click on the Start Menu icon in the taskbar and select All apps >.
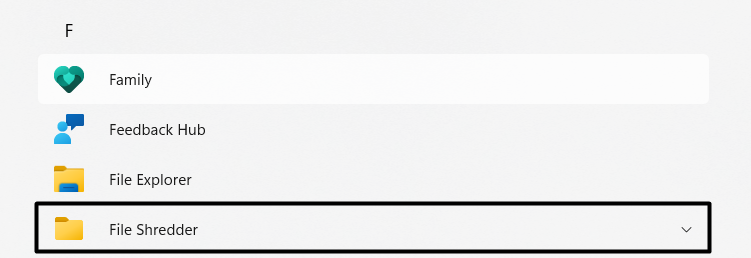
- Move to the “F” alphabet in the All apps section and look for File Explorer in the same section.
- Lastly, click on File Explorer to launch it. Once done, the File Explorer program will open on your PC. You can also right-click on the Start Menu icon and select File Explorer from the menu to open File Explorer with a single click.
Using the File Explorer Shortcut
Windows allows us to create shortcuts for our favorite programs to access them straight from the desktop. You can also create a shortcut for File Explorer and place it on the desktop. It’ll be available to use all the time and present on the desktop. You can follow the below-mentioned steps to check the whole process:
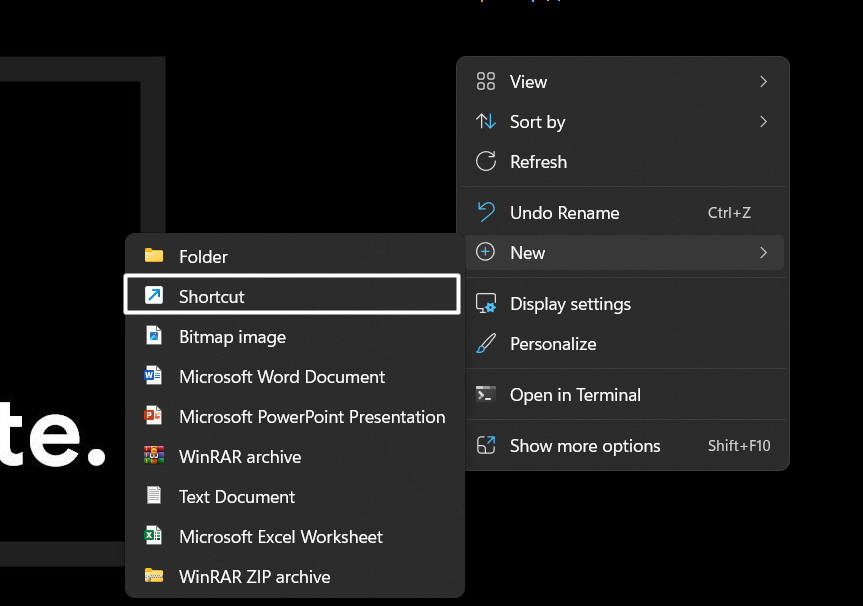
- First, right-click on the desktop and hover the arrow on New.
- Next, select Shortcut from the New dropdown menu to create a new shortcut for the File Explorer.
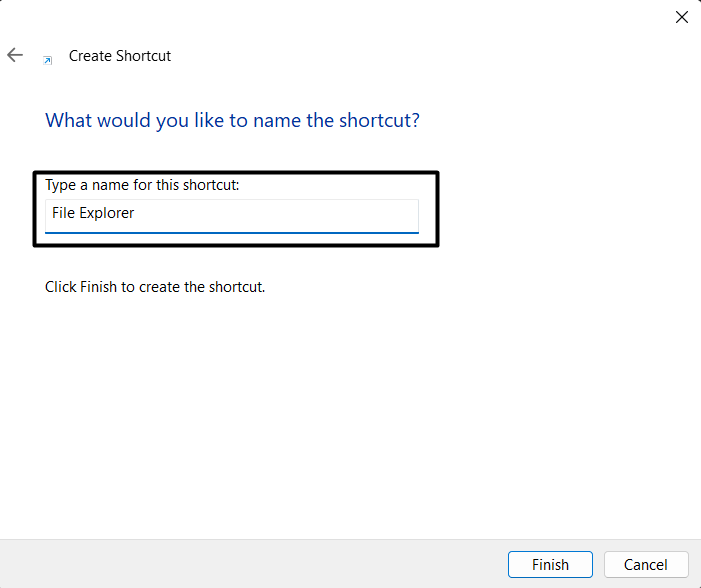
- Now, enter explorer.exe in the Type the location of the item text box, and click Next to proceed further.
- After that, enter File Explorer in the Type a name for this shortcut text box and click Finish. Once done, you’ll see the File Explorer shortcut on your desktop. Simply double-click on the shortcut to open File Explorer.
Via Run Command Box
You can also launch the File Explorer program on your Windows 11 PC using the Run program. Here are the steps to do the same with ease:
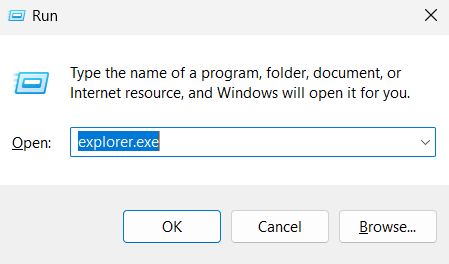
- Firstly, press the Windows + R key combination on your keyboard to open the Run dialog.
- Next, enter explorer.exe in the Run dialog’s search box and press the Enter key.
Using the Terminal App
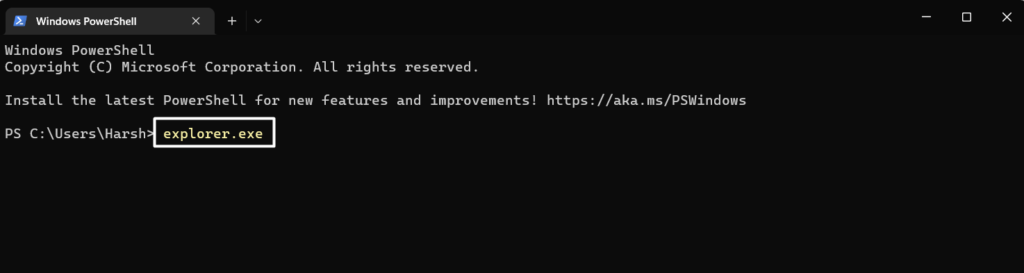
We all have used Terminal or Command Prompt once to run SFC and DISM scans. We can also use Terminal and CMD to launch the File Explorer program. So, open the console on your system and type explorer.exe. Once done, press the Enter key to run the File Explorer program. You’ll now see the File Explorer opened in front of you.
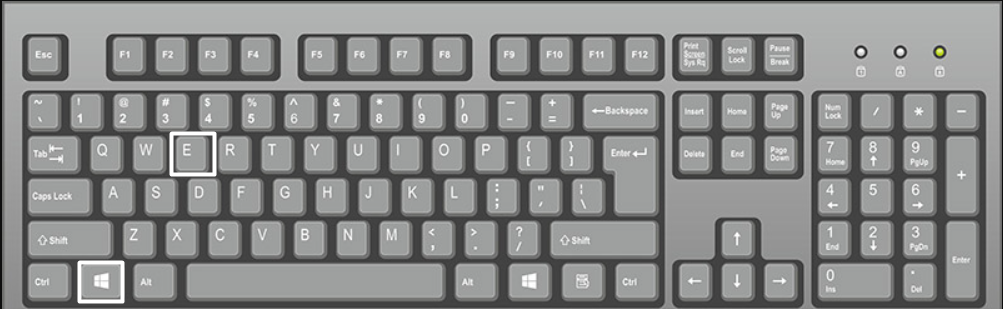
Use the Keyboard Shortcut
The last way to access the File Explorer program on Windows 11 is by using the dedicated keyboard shortcut. You can open the Windows File Explorer by pressing the Windows + E keyboard shortcut. That’s it!
Exploring Categories in File Explorer in Windows 11
Opening File Explorer on Windows 11 was easy, and you know it. Right? You should now open File Explorer on your Windows 11 PC. So, once you open the File Explorer, you’ll see five categories in the left navigation panel: Downloads, Pictures, Music, Videos, and Files. Without these categories, File Explorer is just a file management tool with no sorting abilities. Thus, it’s important to understand the categories section properly to use it efficiently. This is why we’ve explained all the categories mentioned in the left navigation pane in detail. Let’s read about them below. Downloads: Starting with the Downloads section, it displays all the files we download from the internet in one place. You’ll find yourself navigating to Downloads more often as we keep downloading different files from the web. It doesn’t matter what the file format is; all the file formats will be shown there. Documents: The Documents section lists all the files on the PC that are identified as documents, such as PDFs, Excel Sheets, etc. You’ll find all formats of files in this section such as .pdf, .docx, .text, xlsx, etc. You can move to the Documents section by selecting Documents in the left navigation pane. Pictures: In the Pictures section, you’ll find all the images stored in your storage. It lists all kinds of image file types, such as JPEG, PNG, SVG, GIP, and TIFF. Most importantly, this section also lists the pictures taken from the camera and screenshots taken using the Xbox Game Bar and shortcut. Videos: The Videos section displays all the video files stored on your Windows 11 PC storage. You can move to this section from the left navigation pane and watch any video you want using the built-in video player in Windows 11. Music: In the end, the Music section shows all the melodies saved on your system’s storage. Also, if you download tunes using the web browser, they’ll be displayed in this section. So this was a short overview of all categories in the left-side navigation pane of the Windows 11 File Explorer.
Windows 11 File Explorer Menus Explained
Windows 11 File Explorer features three different menus which have varied options for different purposes. Here in this section, we’ve explained all three menus and the options in a detailed manner. Let’s start.
File Explorer Top Ribbon Menu Explained
File Explorer has a ribbon menu at the top, which carries varied options designed to perform basic tasks. It has six different options – Cut, Copy, Paste, Rename, Share, and Delete. These are some basic functions, and everyone knows about them. But still, we’ll recall them as these are the parts of File Explorer. Let’s remember them with a simple example. Let’s say you want to move a document from one location in File Explorer to another location in File Explorer itself. How would you do it using these options? Let’s see. You can start by using the Cut function to copy the document and remove it from the current location. And then copy and paste it to the desired location. Here’s an alternate way that involves the use of the Copy and Paste function. You can copy the file using the Copy function and then paste it to the desired location using the Paste function. Once the file is moved to the preferred folder, you can use the Delete function to remove the previous file from its current location. In case you also want to rename the file, you can use the Rename function to give it a new name. Lastly, the menu also has a Sort option that lets you organize files according to their name, status, modified data, format, etc. You can also group documents by different filters, which makes sorting much easier.
File Explorer “View” Menu Explained
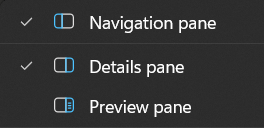
As we move further, the top main menu has a sub-menu called View, which includes some options that let us customize the appearance of File Explorer. You can change the icon size and choose from three icon sizes: Extra large, Large, and Small. It also lets you change the content layout from the View menu. You can decide whether the content should be shown in the List, Details, Tiles, or Content Layout view. Most importantly, this is the menu to enable/disable Preview Pane, Navigation Pane, and Details.
File Explorer See More or Three-Dots Menu Explained
At last, you also get a See more (…) sub-menu, which has some options that help a lot while using File Explorer. Most options, like Undo, Pin to Quick Access, Select All, Select None, and Invert selection, are self-explanatory. One of the most important options in the menu is Options which sends you to the File Explorer Options section.
Common Windows 11 File Explorer Keyboard Shortcuts
Most of us know what keyboard shortcuts are and how they help us be productive at work. This is why this section shares some keyboard shortcuts that you can use while using File Explorer to perform certain tasks just with your keyboard. So, check all the keyboard shortcuts mentioned in the below table and try them.
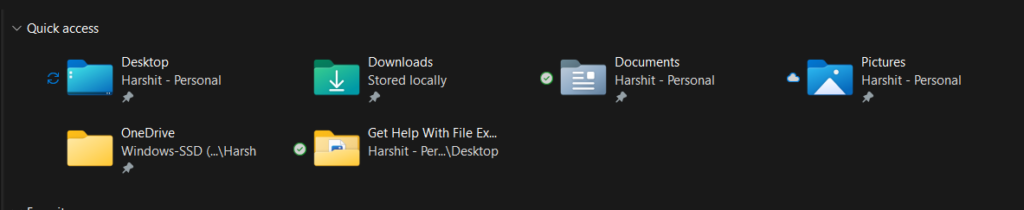
How to Customize “Quick Access” in Windows 11 File Explorer
The Home section of File Explorer has a separate area called Quick Access, which lets you pin your favorite, important, or most used files and folders for easy access. You can customize this section according to your preferences. For instance, you can pin important folders and files, remove recent folders, and do much more. In this section, we’ve explained how you can customize Quick Access so it can make things easier for you.
How to Pin & Unpin File Explorer Items to “Quick Access”
As mentioned above, File Explorer allows you to pin items, like files, folders, etc., to Quick Access so that you can access them anytime. You can also unpin them when you want. We’ve explained all the steps of pinning and unpinning items to Quick Access in the mentioned steps:
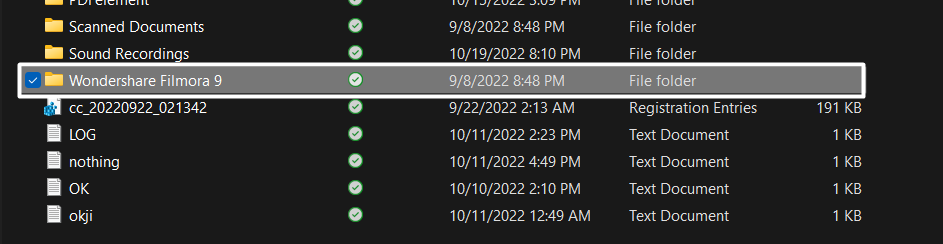
- First, open File Explorer on your PC and select the item you want to add to Quick Access.
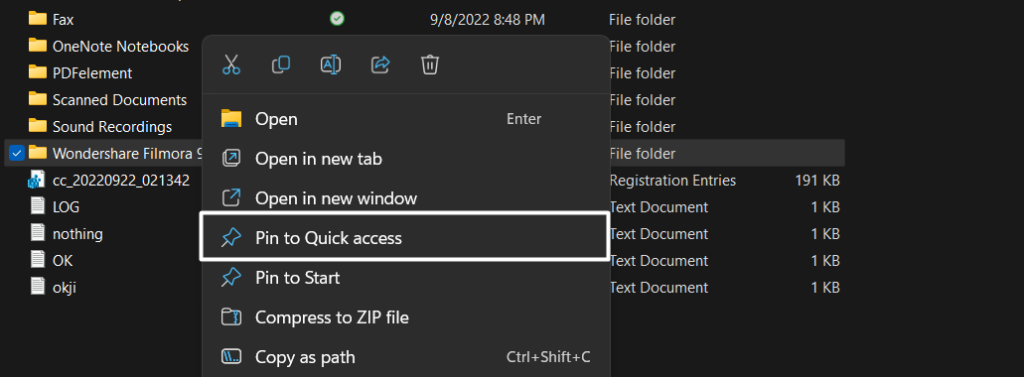
- Next, right-click on the item, and choose Pin to Quick access from the menu to display it in the Quick Access section. You can now see the same item in the left navigation panel and the Home page under Quick Access. You can now also unpin the same pinned item from the Quick Access section, and below are the steps to do the same with a single click:
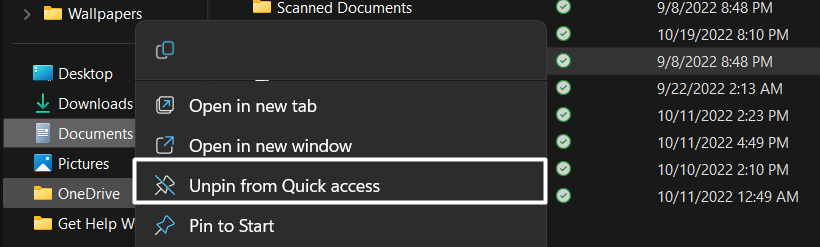
- The first step is to move to the Home area of the File Explorer program and select the pinned item under Quick access.
- Then, right-click on the selected item in Quick Access and select Unpin to Quick access from the contextual menu to remove it from Quick Access.
How to Remove “Folders” and/or “Recent Files” From Quick Access
As you move to the Home in File Explorer, you’ll see that it’s divided into two sections: Quick Access and Recent Files. We already know what Quick Access is and its use. The Recent Files section lists the most recent files and documents you opened on your PC. In case you don’t want to see recent files or folders in the Home area for some reason, you can disable them by following the below-mentioned steps:
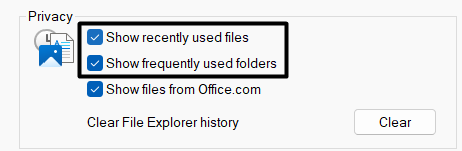
- To start, open the File Explorer program, click on three dots in the top ribbon menu, and select Options from the dropdown menu.
- In the General section, uncheck the Show recently used files and Show recently used folders checkboxes.
How to Print a Document or File in File Explorer
We often need to print documents and files for different purposes using our computers. There are varied ways to print documents in Windows, and one of them is through File Explorer. File Explorer allows us to print whatever document we want in a few simple steps. Follow the mentioned steps to print documents or files in File Explorer:
- First, select the document in the Documents section, right-click on it, and select Show more options from the menu to open the entire contextual menu.
- Select Print from the context menu and follow the on-screen instructions to continue printing the document.
How to Customize the File Explorer Interface
We all have now learned to use File Explorer properly. It’s now time to learn to customize the File Explorer to make it look how we want it to. In this section, we’ve explained how you can change the icon size, content layout, and much more to make the File Explorer program more attractive.
How to Change the Layout of File Explorer
File Explorer allows us to customize the layout of our File Explorer feed. In short, you can decide how the files and folders should be previewed in File Explorer. For instance, whether the content should be displayed in the List view or Tiles view. You can choose the layout type according to your choice by following the below-mentioned steps:
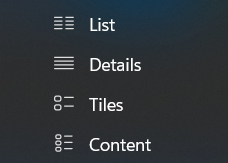
- Open File Explorer and click on the View option next to Sort in the top menu to open the context menu. 2. Then, select between List, Details, Tiles, or Content Layout. By default, it would be set to Tiles. But you can try all sets of layouts and keep what suits you better.
How to Change File and Folder Icon Sizes
By default, the icon size would be set to Small. But you can change the icon size according to your taste. So follow the below-mentioned steps to change the icon size:
- To do so, open the File Explorer program on your PC and click the View option in the ribbon menu to change the icon size.
- Now, you’ll get four options to choose from: Small icons, Medium icons, Large icons, and Extra large icons. You can choose what seems better to you.
How to Increase File Explorer Text Size
You can’t change the text size, especially for File Explore. But you can change the text size for the entire system, which will eventually change the File Explorer text size. You can follow the below-mentioned steps to change the text size:
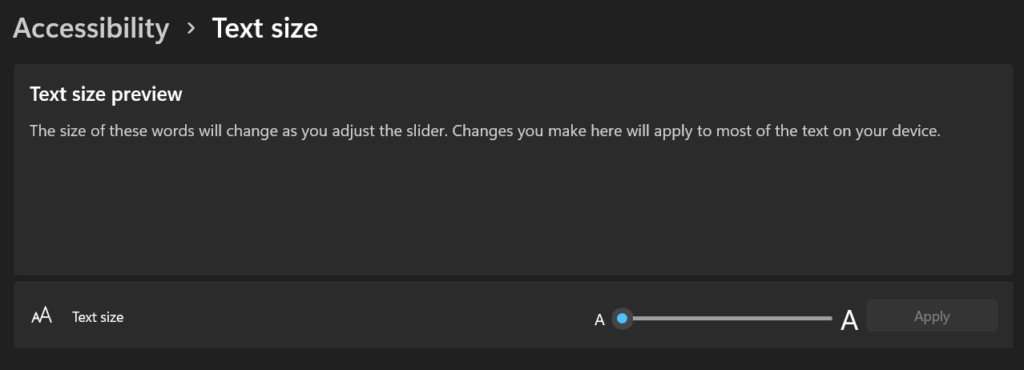
- First, press the Windows + I keyboard combination to open the Settings app and move to the Accessibility section.
- Click on Text size, and drag the cursor next to the Text size to increase or decrease the text size according to your needs.
How to Enable File Explorer Preview Pane in Windows 11
File Explorer has a Preview Pane feature that lets us preview the file in the sidebar before opening it. You can enable this option right from the View menu. We suggest following the below steps to enable the Preview Pane feature:
- To start, open the File Explorer program, and click on View in the ribbon menu to open the dropdown menu.
- Now, hover the arrow on Show and make sure there’s a tick next to the Preview pane. If not, click on the Preview Pane to enable it.
How to Change From Light Theme to Dark Theme and Vice-versa in File Explorer
Many of us like to use apps in the dark mode as it reduces stress from the eyes. However, there isn’t any option to enable dark mode, especially for File Explorer. For that, we need to use all system apps in dark mode. You can follow the below-mentioned steps to turn on dark mode for all Windows apps, including File Explorer:
- To start, open the Settings app and navigate to the Personalization section from the left navigation pane.
- Click on Colors to open the color settings and set the Choose your mode option to Custom.
- Then, set the Choose your default app mode option to Dark to make the background of all Windows apps black.
How Do I Repair File Explorer in Windows 11?
We suggest restarting the system to repair the File Explore program in Windows 11. If this doesn’t resolve the issue, you can try updating the OS to the latest version to ensure the issue doesn’t appear because of a bug.
Is File Explorer Different in Windows 11?
File Explorer in the new Windows 11 is mostly similar to Windows 10 File Explorer. But the Windows 11 File Explorer has a new interface and some extra capabilities that aren’t present in Windows 10.
How Do I Fix File Explorer Problems?
If you’re facing issues with File Explorer, we suggest ensuring the system has enough free disk space to let File Explorer work properly. This is because it requires a substantial amount of storage to run properly.
Why Does File Explorer Not Work in Windows 11?
There could be several reasons behind the ill-functioning of the File Explorer program. In some cases, it’s found that corrupted cache files lead to this issue. At the same time, some users reported that insufficient storage caused this issue with the File Explorer app.
Can I Uninstall and Reinstall File Explorer?
You can’t uninstall the File Explorer tool from your Windows 11 PC, as it’s responsible for the proper functioning of many programs and services.
We Did It! There You Go!
So, how was it? Wasn’t it easy to use the File Explorer program of the new Windows 11? File Explorer is integral to Windows OS, and everyone should know how to use it efficiently. Otherwise, they can’t make the most out of Windows. Our primary purpose for creating this guide was to teach you all the basic to advanced functions of File Explorer, and we think we did that. Do let us know whether this guide was helpful to you. Also, share it with someone new to Windows and struggling to use Windows File Explorer.


![]()


![]()