What if any of the methods discussed above fail to fix the connectivity issue? The last solution is to reset network settings in Windows 11 to bring everything back to normal. Network settings play a vital role in connecting your PC to the internet connection. With Windows 11, the company has made it easier for users to modify settings the way they want.
How to Reset Network Settings in Windows 11
In case, you’ve recently installed Windows 11 but couldn’t figure out how to reset your network connection in Windows 11, then fret not! In this blog post, we will share with you possible ways on how to do that:
Reset Network Settings using Settings app
- Open the Settings by pressing Windows Key + I keys.
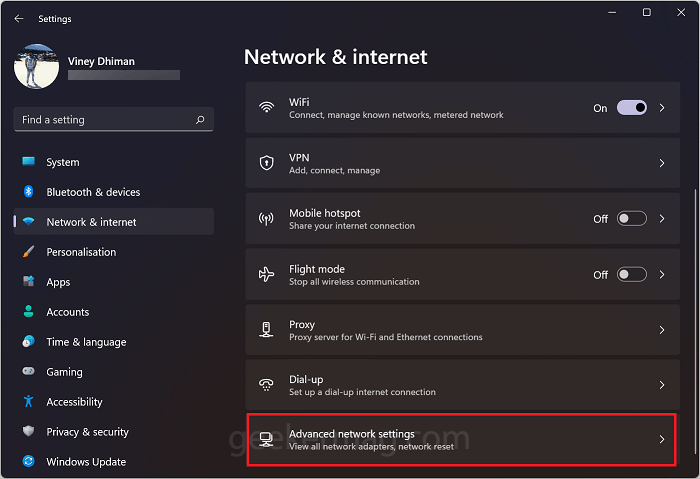
- Select Network and Internet. From the right pane, select Advanced network settings.
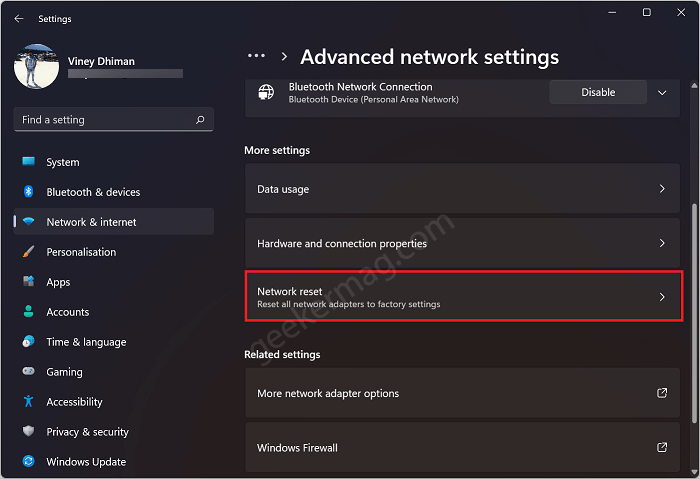
- Here on this page, scroll down to the More settings section and click on the Network reset.
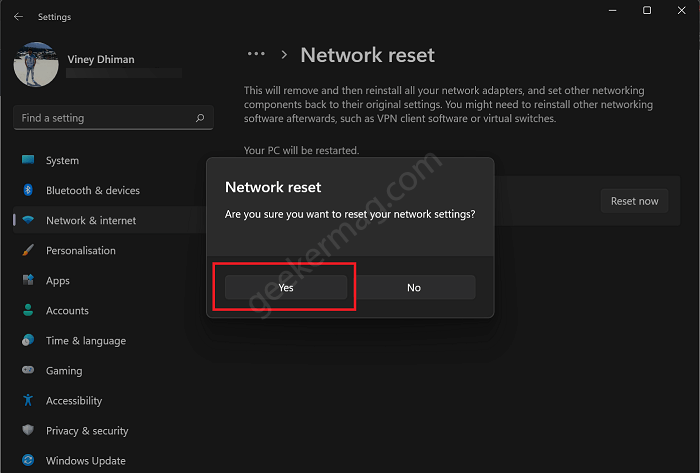
- At last, click on the Reset now button available on the Network reset option box.
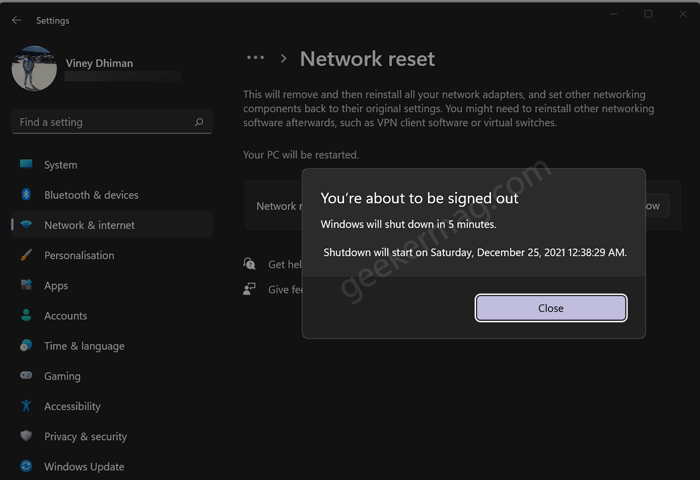
- When a dialog box will appear with a message to confirm your action, then click Yes. Instantly, your device will be disconnected from the internet connection and a dialog box will appear giving you a message that you’re about to sign out. The system will give you five extra minutes to save your data. You can also reboot the computer manually. After a successful reboot, the network reset process completes successfully. Resetting network settings in Windows 11 will delete all the network connections (Wireless and Ethernet) accompanied by network adaptors and various networking components. Don’t worry, rebooting your device will bring everything back to factory settings.
Reset Network Settings using Device Manager
Apart from that, you can also reset network settings using Device Manager. You can count this method as a workaround, but not an exact method. Here’s what you need to do:
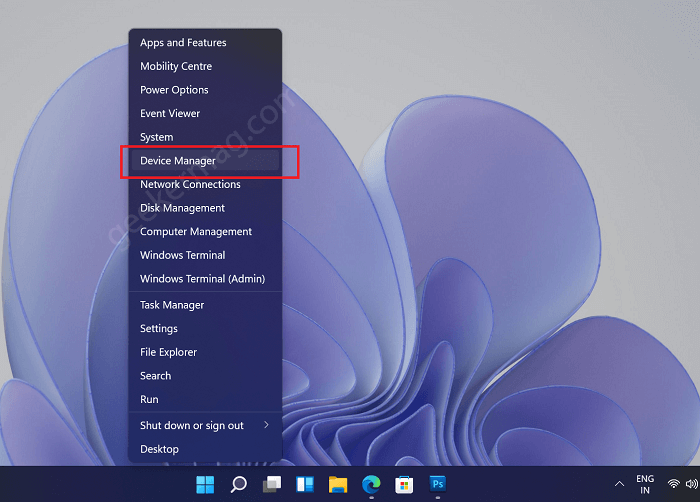
- Press WIN + X keys at the same time and select Device Manager from the menu.
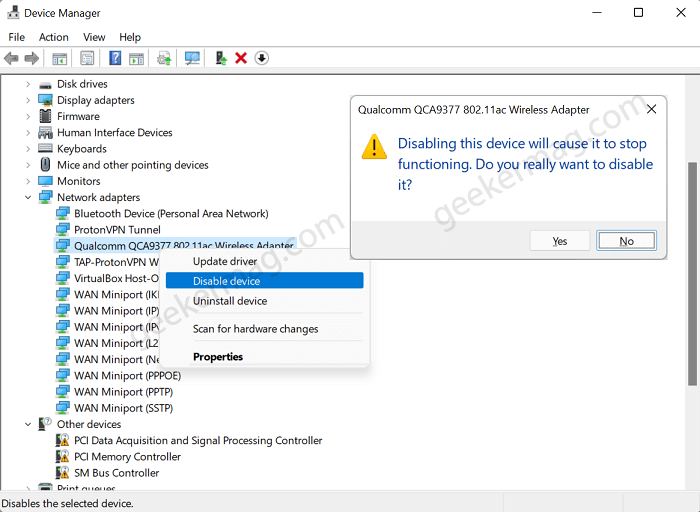
- Expand Network adapters in Device Manager. Select the main network adapter. Right-click the selected device. Choose Disable device. When a dialog box appear asking for your confirmation, then click Yes. This list of devices is automatically refreshed as soon as you click the Yes button.
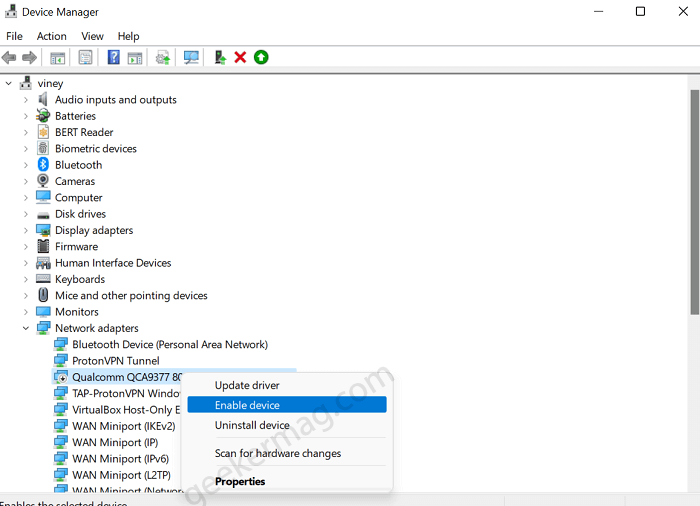
- After that, right-click on the primary network adapter and select Enable device. This will reset your Windows 11 system’s primary network adapter. As discussed above, there are various ways to troubleshoot network connection issues, but resetting network settings is one of the useful and convenient.