Downgrading involves backup (optional but recommended) → Erase macOS Monterey → reinstall macOS Big Sur → restore Time Machine backup.You can reinstall macOS Big Sur through the internet or a bootable USB drive.Keep your Mac plugged in as it’s a lengthy and energy-consuming process.
Note: Open this article on a mobile device or take a printout so that you can refer to it during the downgrading process. If you plan to install macOS Big Sur via a USB drive, create a bootable macOS drive before moving on.
1. Create a backup
A fundamental and essential step is to ensure the files, documents, photos, or folders created while using the beta aren’t lost. You can either upload them to cloud services like iCloud or move them to an external drive for safekeeping. Also, if you did not make a Time Machine backup before installing macOS Monterey, it is wiser to make a copy of old & new files.
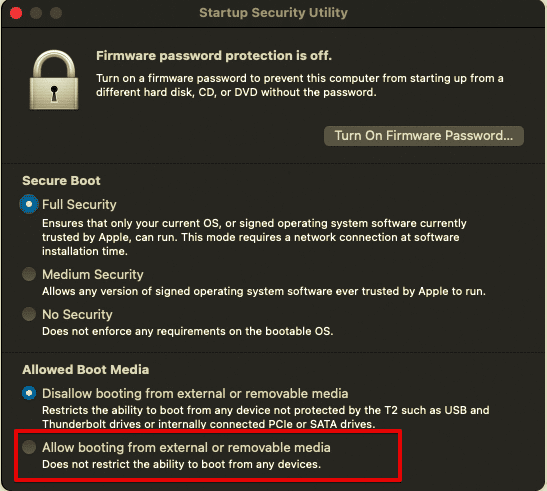
2. Disable external boot media protection on Mac with the T2 security chip
Apple introduced a new security feature on Mac with T2 security chips. It lets you disallow Mac from starting up from external or removable media. If you try to boot from external media, you will get a warning. It is important to disable external boot media protection while downgrading from macOS Monterey. You can do so by Opening Security Utility and choosing the appropriate setting. Follow the steps below to disable booting from external boot media. For the sake of security, revert to “Disallow booting from external or removable media” once you are done with the downgrading process.
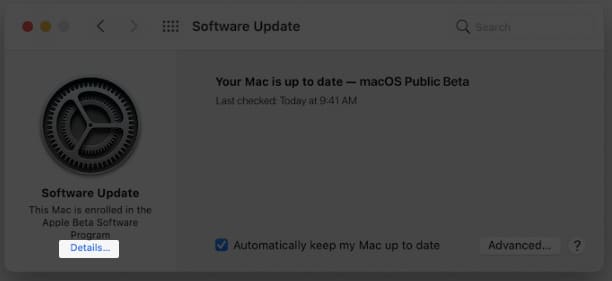
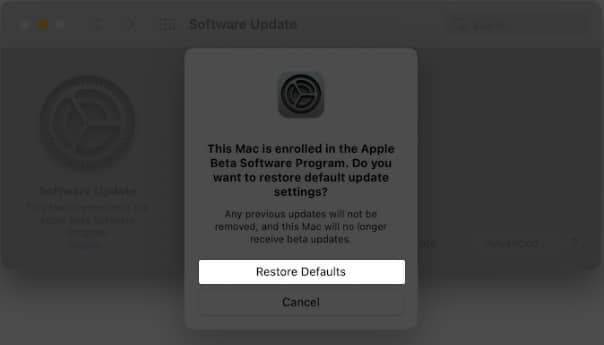
3. Delete macOS Beta User Profile
Many users complain that their Mac automatically installs the latest macOS beta instead of downgrading to Big Sur or other stable versions. After a little digging, we found that macOS will revert to the latest beta until and unless you opt-out of the beta channel. In other words, you will have to delete the macOS Beta user profile to install macOS Big Sur stable build.
4. Erase macOS Monterey from Mac
Firstly, you’ll need to enter the Recovery Mode, and the method varies depending upon the silicon your Mac is carrying. For M1 Macs For Intel-based Macs Once you enter the recovery mode, follow these steps to remove macOS Monterey from your device. Now that the beta profile is removed from your Mac, you can revert to macOS Big Sur via the internet or a bootable drive. Steps for both methods are mentioned below. Note: Both the methods need you to download the complete macOS (around 8+ GB), so high-speed internet is recommended. However, the USB drive method offers quicker installation.
5. How to reinstall macOS Big Sur
I. From the internet
II. From a USB drive
6. Restore Time Machine backup
If you don’t have a recent Time Machine backup, skip this part. You’ll have an internally new Mac. But if you do, it’s time to restore all previous settings and files to your Mac. The process may take some time, so sit back, grab some coffee, or a power nap. So this is how you can downgrade macOS Monterey beta to macOS Big Sur. It may seem a little complicated, but this shouldn’t be that difficult if you follow the above steps. The macOS Monterey beta version could be a little buggy, but it surely gives you the lay of the land. Share your views about Apple’s latest macOS update in the comment section below. Read more:
How to downgrade iOS 15 beta to iOS 14Download macOS Monterey wallpapers (6K resolution)How to use two-factor authentication in macOS MontereyHow to add, delete, or erase APFS Volumes on Mac