Windows 10 is one of the best operating systems in Windows OS line up. It has lots of new features, settings and apps which make it more productive for the users. With every window update, users receive lots of errors and bug. Some of the issues can be fixed by just by running inbuilt Windows 10 troubleshooters available for every component. While there are some other sticky errors which can’t be fixed just by running a troubleshooter or performing necessary troubleshooting steps, as they require some special efforts. In today’s post, I’m going to discuss with you one out of those error with a solution that works hundred percent. Some of the GeekerMag regular readers sent me a message telling that: First User: Most of the time when I’m trying to launch the application of Windows 10 a dialogue box appears with the message which reads: Second User: After updating to latest version of Windows 10 whenever I’m trying to run any Adobe product I’m receving error which reads This is really sticky and annoying error but can be fixed easily. It is possible that in your case you might see different error messages for the same .dll file which are as follows: While in some case, you can receive the same error message for different .dll file like shown below: In most of the cases, you see this error if Microsoft does not include the entire Microsoft Visual Studio C++ 2012 Runtime libraries in Windows 10 or if some of the files got corrupted.
Fix MSVCP120.dll is Missing in Windows 10
But don’t worry this issue is not scary as it sounds and can be fixed just in one minute. In upcoming lines, you will read step by step instruction on how to fix MSVCP120.dll is missing in Windows 10.
First of all you’re required to visit this download page of Microsoft.
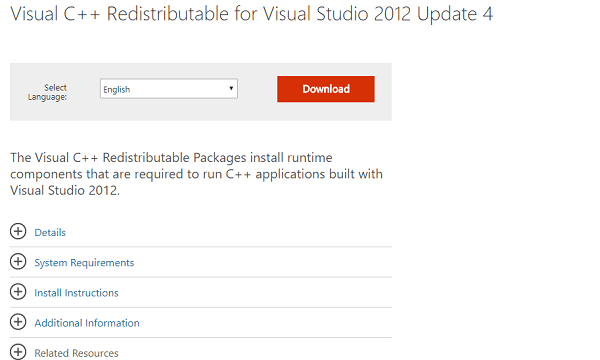
Scroll down and you will find heading which reads “Visual C++ Redistributable for Visual Studio 2012 Update 4“. Under it use the “Select language” drop-down to set language depending on your region and click on Download button.
Here on this page, you need to select the file according to your operating system architecture. If you’re running Windows 10 – 64 Bit, then download “VSU_4\vcredist_x64.exe” and for Windows 10 -32-bit download ” VSU_4\vcredist_x86.exe” and click on the Next button. Downloading will start.
Run the vcredist.exe file and follow the instructions to complete the installation.
Reboot Windows 10 computer. I gurantee you this will fix MSVCP120.dll is missing in Windows 10 or any other .dll missing file issue. Why don’t you give a try to this solution and let me know if this was helpful or not. In case, you have any other easiest solution to fix MSVCP120.dll is missing in Windows 10 issue, then drop it in the comments so that other users can also take advantage.