To get started Microsoft has added few themes in Windows 11 which include Windows 11 light, Windows 11 Dark, Windows 11 Flow, Windows 11 Sunrise, Windows 11 Captured Motions, and Windows 11 Glow theme. The dark and light theme only has one desktop background while other themes in the list come with a set of amazing desktop backgrounds. With default settings, Windows 11 Light theme is applied across the system.
Procedure about Setup, Install and Change Windows 11 Theme
If you don’t know Windows themes has one or more desktop background accompanied by accent color, sound schemes, and icons. In case, you’re not a fan of the default light theme, then you can easily change the theme in Windows 11 just like in Windows 10.
How to Change Theme in Windows 11
You can either install themes that come preinstalled in Windows 11 or download a new theme from Microsoft Store which suits your preference. In this blog post, we will everything you need to know about Windows 11 themes from installing to removing. Let’s get started:
Set Preinstalled Themes in Windows 11
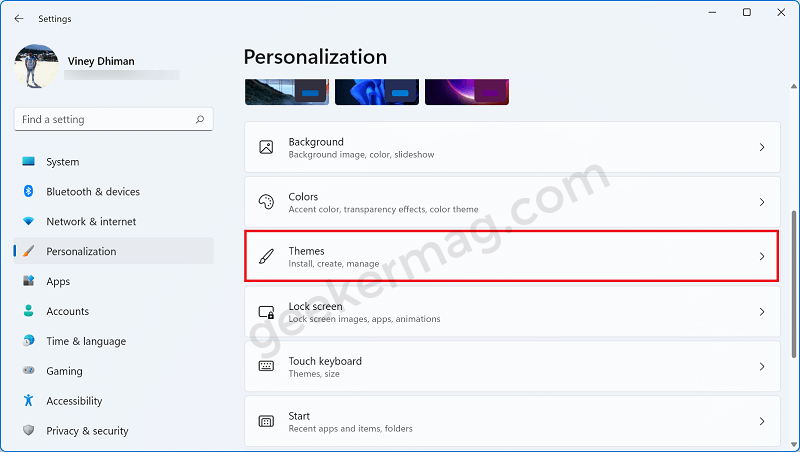
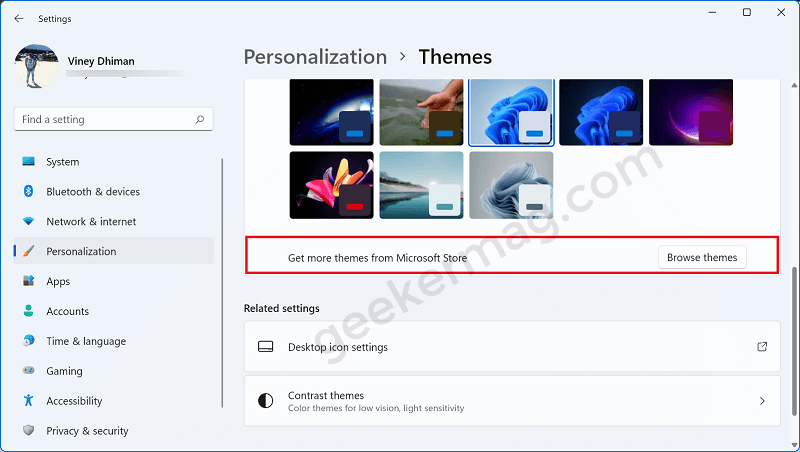
Launch Settings app in Windows 11. For that, use the WIN + I key combination. Switch to the Personalization tab available on the left side. Alternatively, you can directly reach Personalization settings. For that, right-click on the Desktop and select Personalize. Select Themes options available on the right side. Under the Current theme section, you will find out the default themes of Windows 11 accompanied by the other themes that come preinstalled. Here, make a click on the theme that you want to set a default theme. Wait for few seconds so that the particular theme is applied across the Windows 11 UI components.
Downloading Windows 11 Themes From Microsoft Store
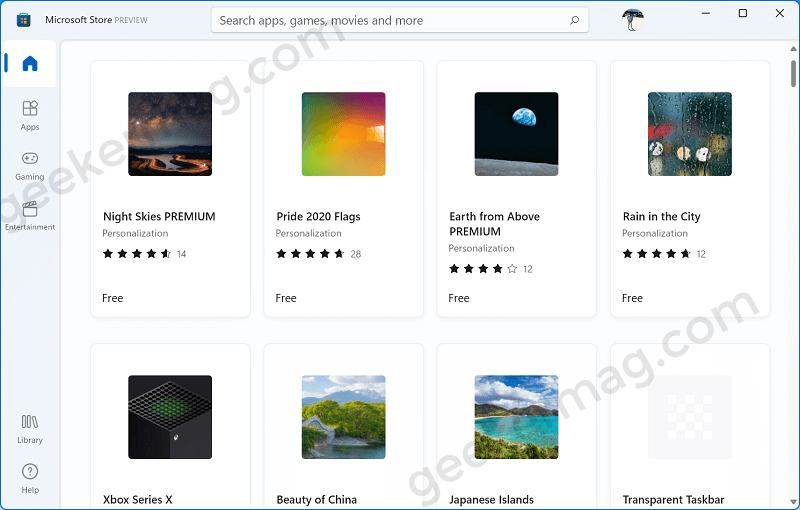
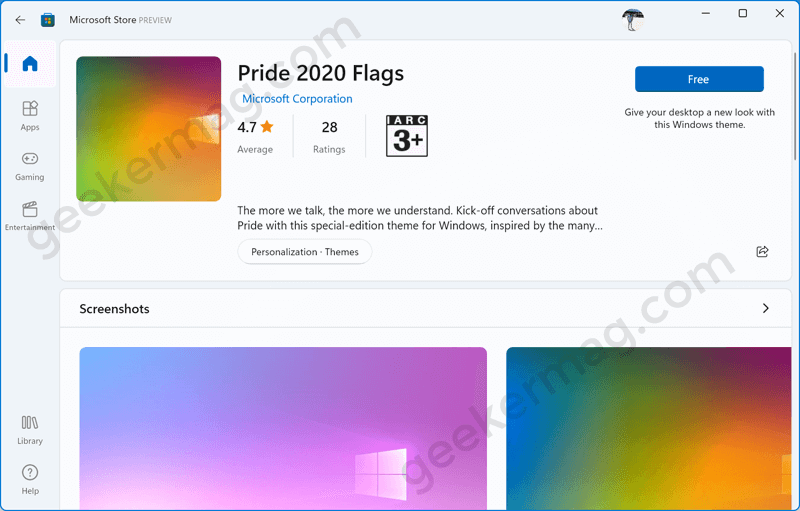
In case, you don’t want to use the in-built themes in Windows 11, then the good thing is that you can also download the themes from the Microsoft Store. To download the theme from the Microsoft Store, follow the steps given below: Following the steps discussed above, again head over to the Themes settings page. On the right side, head over to the section that reads “Get more themes from Microsoft Store” and then clicks on the Browse themes button. Instantly, you will be redirected to Microsoft Store showing you a list of themes that you can download and set in Windows 11. Select the one you want to download. If it’s a free theme, then you will see Get/Free button. And if it’s paid theme, then you need to purchase it first to activate the Get option. Once the theme is downloaded successfully, it will start appearing in the list of themes on the Theme settings page. Again following the same procedure, click that particular theme to set it.
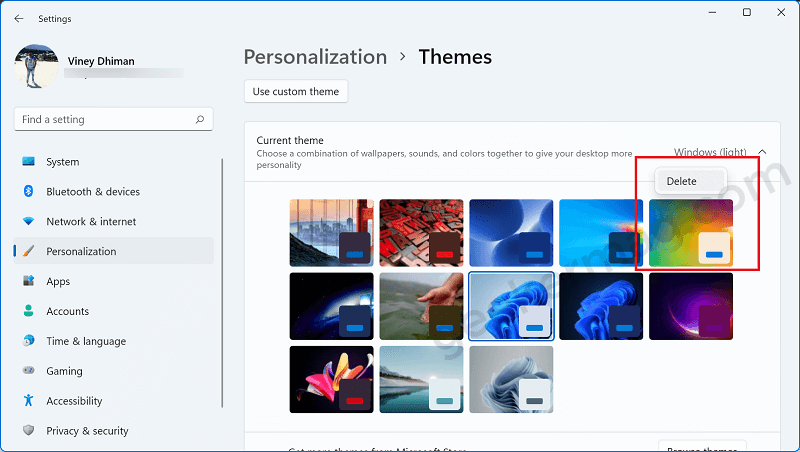
How to Delete a Theme in Windows 11
Except for the themes that come preinstalled in Windows 11, you can delete all the themes that you have either downloaded from Microsoft Store, a custom theme that you have created, or a third-party source. Here’s how you can do that: Launch Settings > Personalization > Theme > Current Theme. Here, locate the Windows 11 theme that you have downloaded from Microsoft Store. Make right-click and Select Delete. That’s how you can install and remove themes in Windows 11. We hope you find this article helpful. In case, you’ve reading disabilities, then you might love to check our previous post on How to Enable High Contrast Theme in Windows 11.