If your device don’t have robust system configuration and so many apps are running in the background can affect the overall system performance.
Fortunately, it is possible to manage permission for these background apps. There are three options available which includes:
Always – Particular app will keep running in the backgroundPower optimized – Windows will decidedNever – Particular app will not run in the background
Depending on the your preference, you can set one of the permission. No only these permissions give control over how to handle background apps, but you can improve system performance by disabling unnecessary apps running in the background in Windows 11.
How to Disable Apps Running in Background in Windows 11
If you made upto this blog post, then its highly possible that you want to learn instructions on how to enable or disable apps running in the background in Windows 11, right? Here’s how you can do that: Note – We would like to tell you the instructions discussed below are applicable to Microsoft Store apps. To stop desktop apps from running in the background use settings offered by those apps.
Disable Individual Background Apps in Windows 11
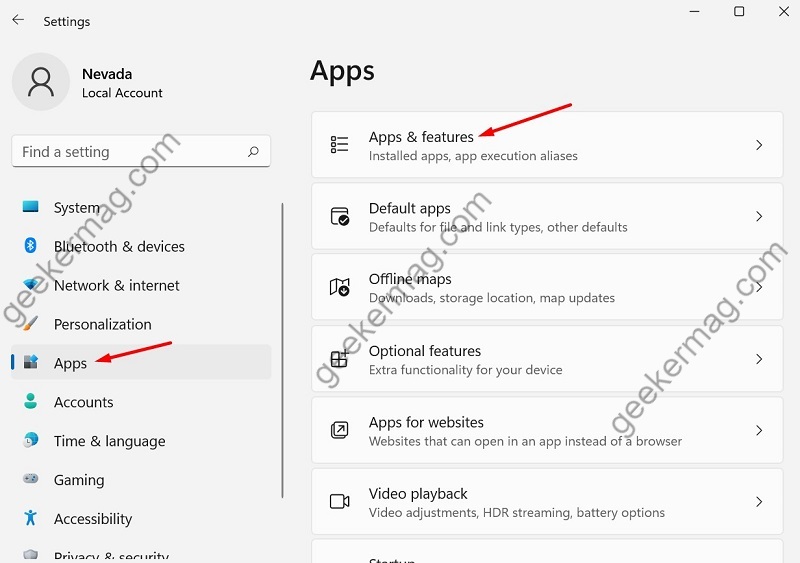
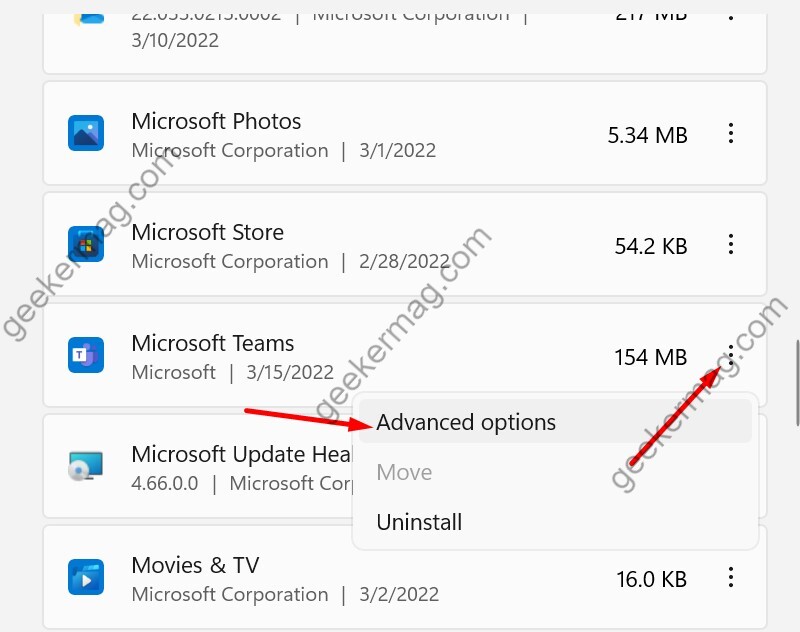
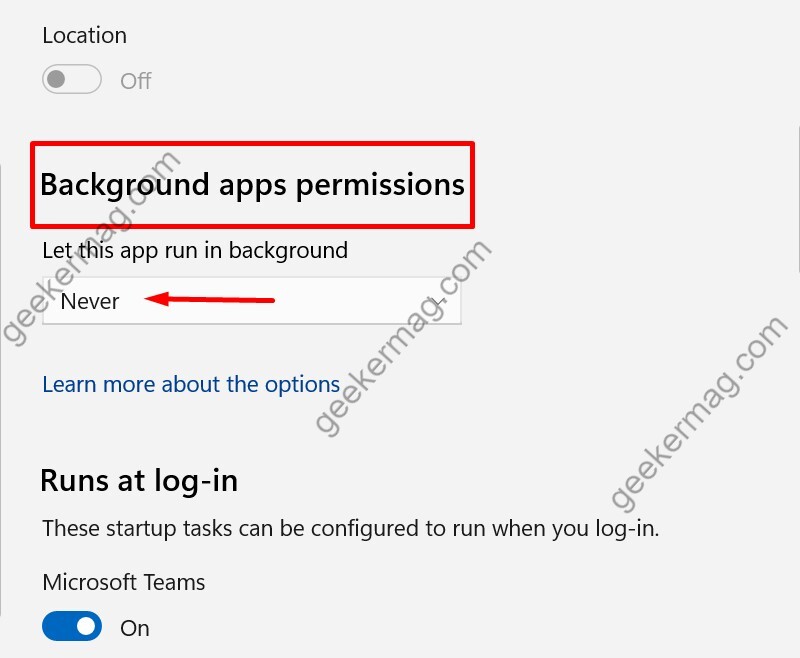
Open Windows 11 settings by using WIN + I key combination. In the Settings app, select Apps > Apps & features. From the list of the app installed on your PC, locate the one that you want to stop running in the background and then click on three dots icon and select Advanced Options. Note: If an advanced option is not available, it means the app does not support the background process. On this Settings page, you need to scroll down to Background app permission section and using “Let this app run in the background” drop-down select Never. As simple as that! To enable particular background app in Windows 11, you can either select Always or Power Optimized.
Disable Background Apps from Windows 11 Battery Settings
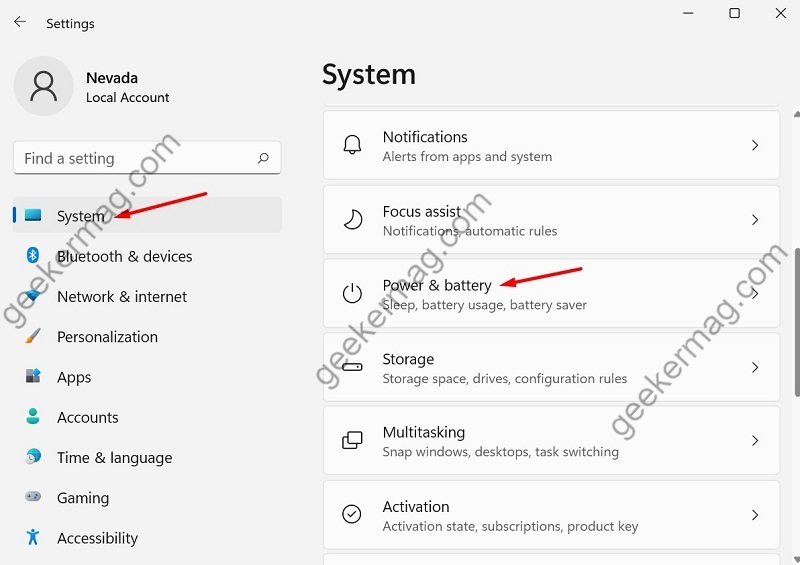
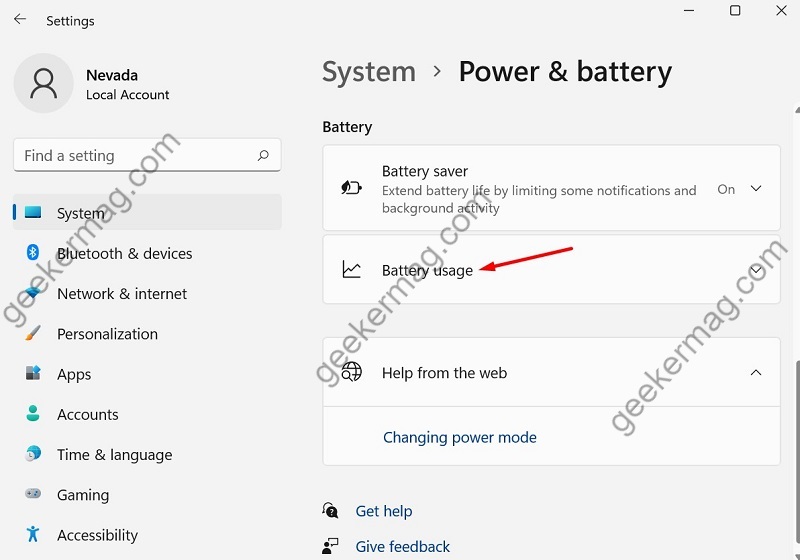
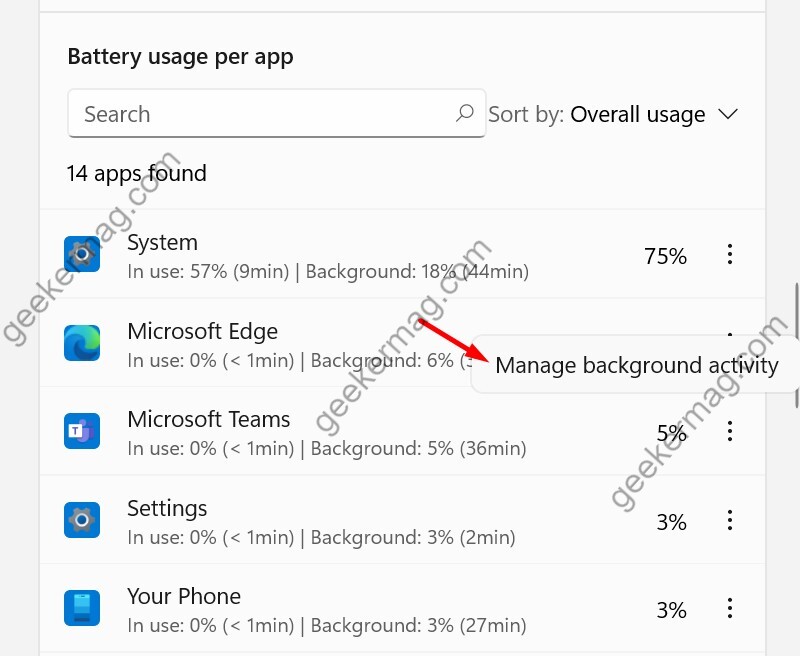
The end results of this method will be same as discussed in method one, but this method will gives you an idea about what app is consuming lots of resources in the background and on the basis of that, you can disable it. Launch Settings app by pressing WIN + I key combo. Select System > Power & battery On this page, under Battery section, select Battery usage. Here, you will find Battery usage by app section, where you will find out usage of application. You need to find the app that you want to disable from running in the background, then click on the three dots and select Manage background activity. This will take you to Background app permissions section, again using “Let this app run in background” drop-down select Never. If the Manage background activity option is not available, the app does not support the background process. To enable particular background app in Windows 11, you can either select Always or Power Optimized.
Disable Background Apps in Windows 11 (All users) with Group Policy Editor
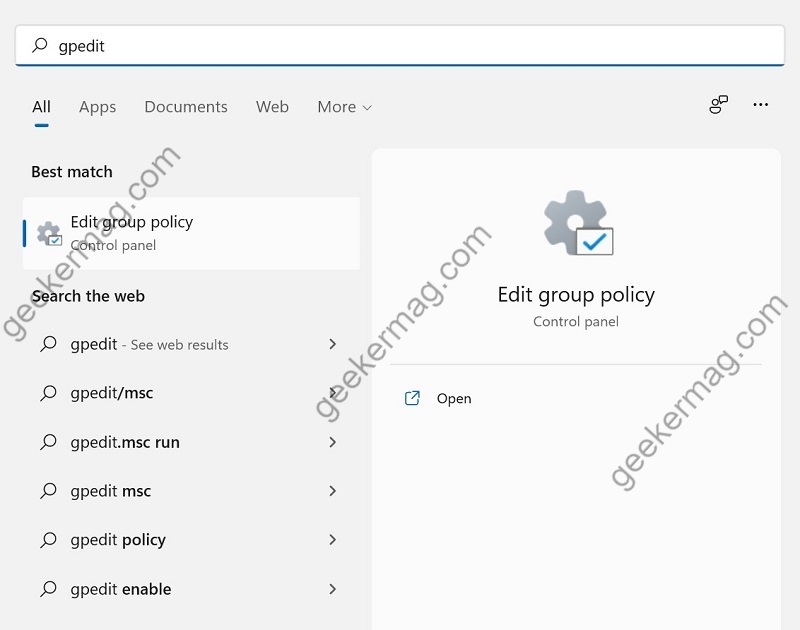
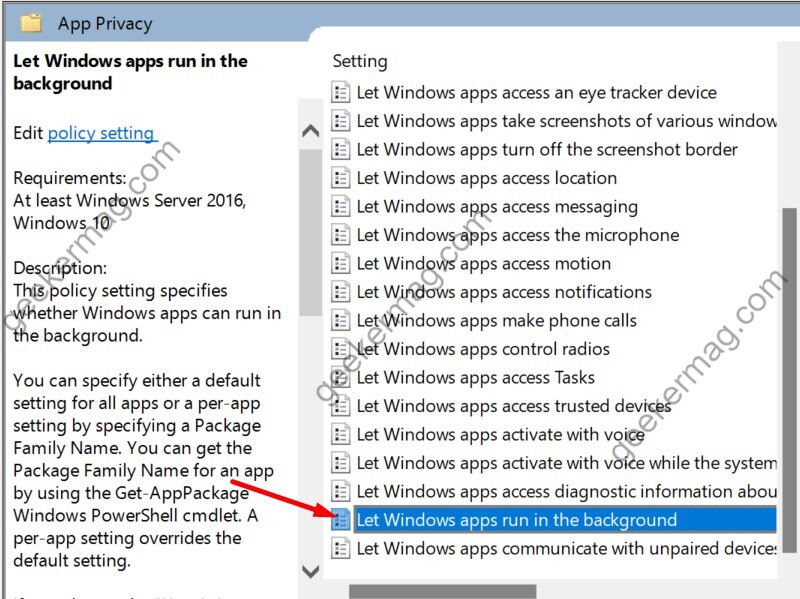
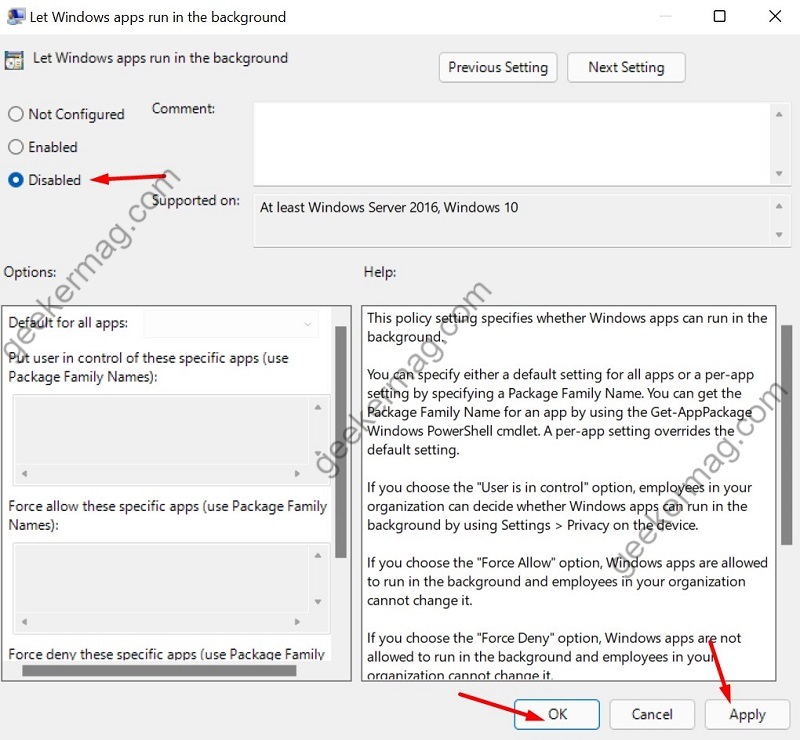
In case, you want to disable all background (Microsoft Store) apps at once for all users in Windows 11, then you can use Group policy editor. This method is applicable for Windows 11 Pro and Enterprise edition users. Click on the Start button to launch Start menu and type “gpedit.msc” in search box, when “Edit group policy” appear in search results, click to open it. In the Group Policy Editor, navigate to the following path: Computer Configuration\Administrative Templates\Windows Components\App Privacy Find and double-click on the “Let Windows apps run in the background” policy in the right sidebar. Here, select “Disabled” and then select Apply and OK to save changes. To enable background apps in Windows 11, you can either select Not configured or Enabled.
Disable Background Apps in Windows 11 (All users) using Registry Editor
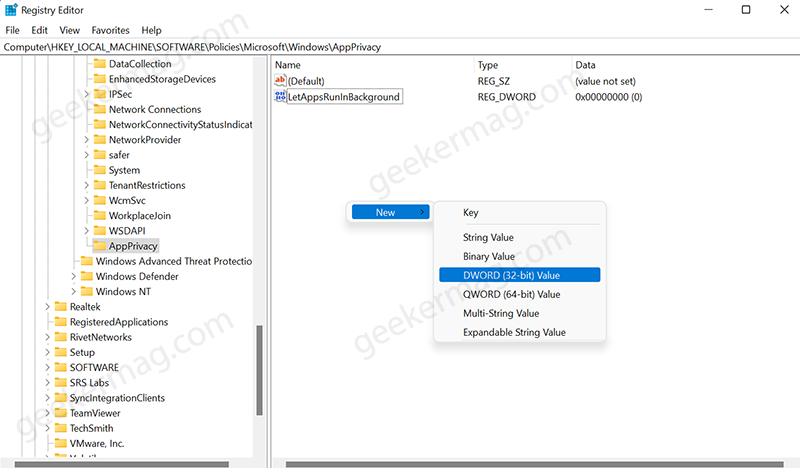
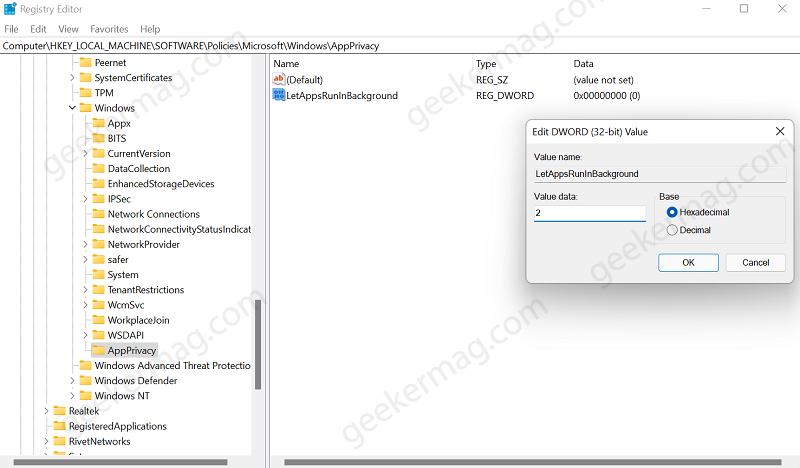
In case, you’re using Windows 11 Home edition, then here’s how you can disable background apps in Windows 11 using Registry Editor. Click on the Search icon and type regedit and when Registry editor appear in search results, click to open it. If UAC dialog box appear click Yes to continue. Here, you need head over to following registry: HKEY_LOCAL_MACHINE\SOFTWARE\Policies\Microsoft\Windows Right-click on the Windows key and then select New > Key and name it AppPrivacy. Select AppPrivacy and then on the right-side, right-click and select New > DWORD (32-bit) Value and name it LetAppsRunInBackground. Double-click on the same DWORD value and set its Value data to 2. After that, click OK to save the changes and then reboot your computer. This will disable all the apps that you have downloaded from Microsoft Store from running in the background. At any point, you want to revert this action, then all you need to do is to delete LetAppsRunInBackground DWORD Value.